
Romancing the Salad
There she laid in her unsavory state... just waiting for an invitation to be free from her own inhibitions. She's all alone, inside such a pristine white bowl, longing for companion. With delicate hands, she was picked from her vine at such a perfect ripe age. Soon she will be draped with chiffonade of basil and arils of pomegranate only to be devoured by salivating embouchement.
Her plump juicy redness is finally laid on the wooden board where she is segmented into wedges, and gingerly tossed back onto a bed of wild mixed greens. She is then joined by the cucumber and they suddenly touch for the first time. Overcome by his rigidness and rough exterior, she becomes excited and she lets out some of her seeds. With her sultry look, he's sliced into half moons. In the midst of the mesclun, this young, sweet, and unblemished tomato, and her cucumber, toss and turn while they are doused with the creamy and tangy wetness of the vinaigrette. Their skins start to glisten - a picture perfect symbol of culinary seduction.
Not much longer they are joined by the pungency of cheesy Gorgonzola and the woody character of Crimini. The maturity of this amalgamation is the spice of life and I found it very satisfying. With every bite, I fall deeper in love. I have savored the splendor of her fruity flavor and I can truly say that she is unsavory no more.
I lay the fork in the bowl where the red tomato once was and I sit back in my chair. I reminisce what I had just experienced while her sweet taste still lingers on my tongue. In silence, I reached for the book that rested on the corner of my table. I gazed at the cover... Fifty shades of ...
2014 New Year's Resolution

Smoked Turkey

This year, based on my wife's ingenious suggestion (and insistent prodding), I have decided to serve smoked turkey for our Thanksgiving dinner. Surprisingly, the process was not too difficult and the result turned out a moist and favorable bird.
... but let's not get ahead of ourselves. The bird needed to be prepared, especially since I'm subjecting my
BRINE
1/4 cup sugar 7 black peppercorns 1 cup of apple juice
2 large onions, quartered 3 fresh parsley stems 24 cups of water
1 large lemon, quartered 3 sprigs of fresh thyme
I steeped this mixture in a large pot and let it cool. Once cooled, I transferred into a large container (I used a 22 quart bucket with a lid that I purchased from Smart and Final). I added about 2 pounds of ice cubes to this mixture before adding the bird in. I made sure that the bird was completely submerged in the liquid so I add more ice and water as needed to submerge the bird completely. I then placed the bucket in the refrigerator to brine overnight.
SMOKING THE TURKEY
The day of the party, I made a rub with various spices found in Indian cuisines (get it... Thanksgiving... Indian... well...) I used 1 cup of dried Italian seasoning (a combination of dried thyme, dried oregano, and dried basil); 2 tablespoons of ground cumin, 2 tablespoons of ground coriander, 1 tablespoon of ground turmeric, 1 tablespoon of sumac... and that is as they say "the rub..."
I then prepped the turkey by taking it out of the brine and drying it with paper towels. I then massaged the turkey and rubbing the skin with grapeseed oil (I offered it cocktails but after his massage, he was dead to the world...). I seasoned the bird with Kosher salt and ground black pepper, inside and out. I then applied the rub and placed the bird in the smoker. As mentioned above, "I smoked this turkey!"
THE FINISH
After smoking the turkey, I transferred it onto a large roasting pan and placed it in the oven set at 350° F to finish cooking. When the temperature of the breast came to 155° F (which is equivalent to approximately 1-1/2 hours), I took it out of the oven and tented it with aluminum foil. The residual heat continued cooking the turkey until it reached its final temperature of 165° F temped at the breast.
THE OUTCOME
Overall, this process was no more difficult than straight oven roasting, although the flavor of the apple wood smoke gave the taste profile another layer of dimension. One characteristic of the the smoking process that I thought enhanced the final result was that it helped produce a crispier skin than with strictly oven roasting. Everyone truly enjoyed the flavor, many of whom have never experienced smoked turkey. This was a great success and may end up to be a beginning of a new tradition.
ROULADE
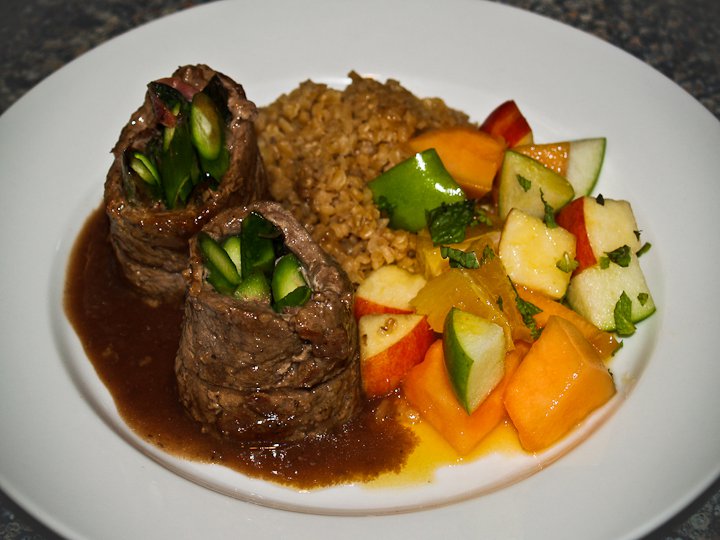
Just the mention of the word conjures up images of sophisticated dishes that only rich royalty is privy to indulge. Dishes that are so skillfully, yet delicately, handcrafted by the masterful royal Chef de Cuisine. A skill that no Chef de Tourant would even dare to try.
Although anyone in the know would just smirk, immediately following it with their signature phrase, "Ain't nuthin' but a thang..." For you see my curious friends, 'Roulade' is merely a term used to mean rolled food. The term 'Roulade' is derived from the French word 'Rouler' which means 'to roll'. In essence, there are many dishes that would fall into this category; from various countries and various eras. In the true sense of the word, even 'sushi' from Japan or 'dolmathes' from Greece could be considered a Roulade...
Let's get real! True culinary aficionados know the real meaning of the word. Roulade, traditionally speaking, are dishes that are of European in nature and prepared using thin cuts of meat rolled around a filling of vegetables or other types or cuts of meats.
Good examples of these types of dishes would be 'Braciole' from Italy, 'Paupiette' from Normandy or France, and 'Chicken Cordon Bleu' from America.
The process is really simple and if you would like to try this method, you would be amzed at the results. Consequently, I found an old recipe that dates back to sometime in the middle ages. The author is unknown but was thought to be one of the lesser, yet quite ahead of his time, cook who served as one of the staffs to the then King of France at the time.
Pheasant de Roulade
Prepare thy bosom of one dead
At which where raiseth thine hands clutching the mallet that thou hast borroweth from thine blacksmith ally, thou comest down heavily onto thy bosom of pheasant so as to flatten to the thickness the same as that of a frog's leg.
Thou shall uncover thy bosom (of pheasant, you idiot!) and adorn it with slivers of pork meat that has been cured and comest from the Italian region of Parma bearing the title "Prosciutto de Parma". Add to this, fresh leaves of spinach and soft crumbly aged cheese that has been made from the milk of sheep. Thou findest this cheese, 'Feta', in the Greek section of thine favorite market.
Then thou shall rolle thine meat into a tube and wrapping it with thin translucent material to keep in a cold chamber of the castle, lest ye have an ice box, for halfe the hour's time. This shall aide in the presevance of thine shape.
At the while, grab thy enchanted goose and sharply squeeze thine underside until it produces a golden egg. Breaketh thine egg onto a shallow bowl and with thine (clean) fingers, lest ye haveth a fork, whisk thy golden egg until forthy. A second shallow bowl shall thee placeth flour, and a third shallow bowl shall thee placeth bread crumbs (preferrably those that cometh from the land of Japan nameth 'Panko').
Remove from thine rolle of meat thy thin translucent membrane (for this the taste would conjure the monstruous demons from within one's soul if ever added to the fire). Sprinkle upon thy rolled meat a healthy pinch of salt and black pepper.
Prepareth thy skillet by placing atop a couldron of fire with Extra Virgin Olive Oil. Ye may find thyself indulging in a pool of Extra Virgin Olive Oil (for as all knowest, Extra Virgins run abundant through these ages), but a tablespoon will do.
Rolle thy meat in golden egg, then onto flour, then onto Panko breadth crumbs. Addeth to the skillet and browneth thy meat of pheasant on all sides. Finisheth it off in thine oven pre-heated to 400 degrees for 15 to 20 minutes time, or until the internal temperature of the bird reaches 165 degrees. Thou shalt checketh with an mideval thermometer that hast been properly calibrated.
Once done, sliceth thine Pheasant de Roulade on a bias and serveth to thy Royal Highness.
So, there you have it, my friends - a recipe from the past that you may want to try to decipher and prepare.
Until next time, "Savor the sweetness of life!"
Backyard Farming
I've been so preoccupied with work that I've not spent any time on any social activities, let alone share my thoughts with my four followers. For that, I humble myself in a very apologetic, yet not so much as to seem needy for attention. I think you get where I'm coming from here...
I've been following the footsteps of those individuals who are living off the land and eating what they grow. This past March, my wife and I started planting our vegetable garden and in doing so, embarked on our membership to the world of backyard farming. It was very exciting seeing those little buggers sprout out a few weeks later. They're like little kittens or puppies and you want to just hug them and squeeze them (but you can't because they'll die)...
 Then a few more weeks later and flowering begins and the excitement builds up even more. Now, all through this, it's important to water the vegetable garden often. Dave, the botanist who works at Armstrong Garden Center in Long Beach (California) told me how to exactly water my vegetable garden. He said that I should soak the root ball and then wait to soak them again until the ground was fully dry. He said that some people (we won't name any names but you know who you are...) constantly water their plants even if they don't need water. What happens in this case is that the plants get root rot and then the plant eventually die. I said, "Really?!" He said, "Well, it's like shoving food down someone's throat even when they can't eat any more. They want to spew but they can't because you've got that shovel sticking right in their face FULL OF CHICKEN FRIED STEAK AND GRAVY AND ALL THE FIXIN's. EVENTUALLY they can't BREATH ANYMORE and then they DIE!" I said, "A little too intense, Dave; but I get the point!"
"A little too real, Dave?"
"It's not right, I tell you, it's just not right... sob, whimper..."
"Dave! FOCUS!"
So how do you tell when it's time to soak your root balls?!
When to soak your root balls is really a personal thing; but soaking your plant's root ball is done when the ground is dry and is most important when planting in pots. Most often you can tell when the ground is still wet because of the color or shade of browness of the ground. You can't always rely on sight though. You must poke the ground with your finger to get the feel of the land (sort of speak...) When the ground around the root ball is dry, it's time for another good soaking.
Until next time, "Que nostro con puendo para los pestos..." (Which means... absolutely nothing except it sounds good...)
Local Farming

Ironically, all of the farming practices prior to the 20th century were organic farming. The term "organic farming" was coined in 1939 by an English agriculturalist and author, Walter Ernest Christopher James, 4th Baron Northbourne. He conceptualized the farm as an organism having a holistic and equally-balanced approach. During the early 20th century, synthetic pesticides were introduced to the farming industry which led to the organic farming revolution in the 1940's known as the "Green Revolution" to counteract against the industrialization of agriculture.
Today the spectrum has flipped as food corporations have emerged. Large chemical companies like Monsanto have played a major role in the production of synthetic and genetically modified crops and pesticides. Organic foods now only account for 1 - 2% of total food sales worldwide. Large food companies and farms that have jumped on the non-organic food van are buying out small farmers and in some cases forcing them out of business. The government now provides subsidies and are lenient to requirements and business practices of the industrial food companies. At the same time, the government has made it difficult for organic farmers to manage their farms by imposing stricter guidelines and paperwork to document their organic farming processes on a regular basis.
As food consumers, our choices on our food sources and quality of food that we purchase for our families will soon be relegated completely to genetically modified produce and hormone and antibiotic injected meat products if we continue to have large industrial food companies and the government dictate what we eat.
There is hope. More and more people are starting to understand and appreciate the quality and flavor of organically grown food. Local urban farms are starting to sprout around major cities to reclaim unused land as a source for local neighborhoods in acquiring organically grown produce. The world organic market has been growing by 20% each year since the early 1990's. It is up to each community to support their local farmers to keep the Green Revolution alive.
Farmaggedon
13 Is A Lucky Number!
 Vitamins are substances that your body needs to grow, develop and function. There are 13 vitamins your body needs. They are vitamins A, C, D, E, K, and the B vitamins (thiamine riboflavin, niacin, pantothenic acid, biotin, B-6, B-12, and folate). Each vitamin has specific jobs. If you have low levels of certain vitamins, you may develop a deficiency disease. Vitamins A, D, E, and K are fat-soluble, which means they are absorbed into the body with fat and are stored in the liver. The B vitamins and Vitamin C are water-soluble which means they are not stored in the body and need to be replaced every day.
Riboflavin works with other B vitamins and is important for body growth and red blood cell production and helps in releasing energy form carbohydrates.
Good sources of riboflavin are lean meats, eggs, legumes, nuts, green leafy vegetables, dairy products, and milk. Breads and milk are often fortified with it. Because riboflavin is destroyed by light, foods containing it must not be stored in glass containers that are exposed to light.
 Deficiency of riboflavin is not common in the U.S. Symptoms of deficiency syndromes include sore throat, swelling of mucous membranes, mouth, or lip sores, anemia, and skin disorders. There is no known poisoning from riboflavin.
Making Sense of Healthy Weight Loss
- Women: BMR=655+(4.35 x weight in pounds) + (4.7 x height in inches) -(4.7 x age in years)
- Men: BMR=66 + (6.23 x weight in pounds) + (12.7 x height in inches) - (6.8 x age in years)
- Women: BMR=655 + (9.6 x weight in kilos) + (1.8 x height in cm) - (4.7 x age in years)
- Men: BMR=66 + (13.7 x weight in kilos) + (5 x height in cm) - (6.8 x age in years)
- If you are sedentary (little or no exercise): BMR x 1.2.
- If you are lightly active (light exercise 1-3 days a week): BMR x 1.375.
- If you are moderately active (moderate exercise 3-4-days a week): BMR x 1.55.
- If you are very active (hard exercise 6-7 days a week): BMR x 1.725.
- If you are extra active (very hard exercise & physical job or 2x training): BMR x 1.9.
A fully engineered bread
The purpose of this recipe is to document the specifications of a fully engineered design for white bread. The bread, (a.k.a. "Product") shall consist of a crusty exterior and fluffy interior. The product shall yield two loaves both bearing in equal dimensions, weight, and texture. The product and baking vessels shall be capable of enduring temperatures up to 350°F (176.67°C)
Specification Section | |||||
| PART 1 - Glossary | |||||
| 1.1 | Baker – one who bakes | ||||
| 1.2 | Beer – a liquid made of yeast, hops and barley that place the baker in a relaxed state. NOTE: not used in the materials section. | ||||
| 1.3 | Ingredients – See Materials | ||||
| 1.4 | Kneading – a term most commonly used in baking which is the process of mixing/incorporating to expand the gluten proteins to form strands which gives bread their textures and strength. Also can be a form of exercise for relieving tension. | ||||
| 1.5 | Materials – See Ingredients | ||||
| 1.6 | Proofing – a rest period that allows the leavening agent to activate the dough to rise. Also a rest period for the baker to drink more beer. | ||||
| 1.7 | Touchy feely – a temperature testing method where a drop of the liquid is applied to the wrist which shall equate to the same temperature as a properly heated baby’s bottle of milk. Also a term used to describe how the some female species prefer their male counterparts. | ||||
| 1.8 | Yeast – live organism; one of many leavening agents that causes baked goods to rise. Also causes infections in some individuals. | ||||
| PART 2 - Equipment | |||||
| 2.1 | Prep Equipment | ||||
| A. | Liquid measuring cup – shall be that of model number 1050030 manufactured by OXO or equivalent. | ||||
| 1 | Capacity: 4 cups (32 ounces) | ||||
| 2 | Substance: Sturdy molded plastic | ||||
| 3 | Dimensions: 9” x 6” x6” | ||||
| 4 | Weight: 12 oz. | ||||
| B. | Mixing bowl – shall be of size with the capacity to hold all the materials during the mixing process without any loss. | ||||
| 1 | Approved mixing bowl may be of the following makes: | ||||
| a. | Ceramic | ||||
| b. | Metal | ||||
| c. | Plastic | ||||
| d. | Glass | ||||
| C. | Measuring spoon – shall be that of model number 76081V2 manufactured by OXO or equivalent. | ||||
| D. | Wooden spoon – shall be of sturdy design and able to withstand heavy stirring without breakage. | ||||
| E. | Dough scraper – approved models shall be made with either food-grade plastic or stainless steel. | ||||
| F. | Kneading surface – shall be of clean area free of any dirt and grime. It shall accommodate a space to measure no less than 20 inches x 20 inches, or equivalent space as applicable. The objective is not to be able to roll out the dough to blanket an entire nation. The height of the kneading surface shall be of comfortable distance so as not to strain the baker’s back during the kneading process. The height may vary depending on whether you are the tallest living female from China or one of the little people from the Emerald City. | ||||
| G. | Proofing bowl – shall be capable of withstanding heat up to 135°F (57.22°C) and provide enough space to accommodate the rise in the dough after it has proofed (or risen, which ever suits your fancy). | ||||
| H. | Rolling pin – shall be of solid grade material fabricated from wood, marble, hard plastic, or stainless steel (and shall be sturdy enough to inflict serious damage when delivering a blow to a person’s head when the situation calls for it). | ||||
| 2.2 | Baking Equipment | ||||
| A. | Oven – shall have a fully operational door and capable of generating varying degrees of temperature settings either with dial or digital controls. Approved fuels for heating the oven shall either be from natural gas (with the exception of personal methane), or electricity. | ||||
| 1 | Temperatures: | ||||
| a. | Proofing process – 135°F (57.22°C) | ||||
| b. | Baking process – 350°F (176.67°C) | ||||
| B. | Bread pan – shall be of metal grade with no substitutions. | ||||
| 2.3 | Cooling Equipment | ||||
| A. | Cooling rack – shall be a cooling rack. | ||||
| PART 3 - Materials | |||||
| 3.1 | Yeast – the leavening agent used for making bread. Approved measurements shall be either (one or the other but not both) of the following: | ||||
| A. | 4.5 teaspoons | ||||
| B. | 2 packets | ||||
| 3.2 | Water – shall be of lukewarm temperature measuring between 110°F (43.33°C) to 120°F (48.88°C). Approved temperature testing shall be made with either a fully calibrated instant thermometer or with the touchy feely method (Refer to section Part 1-1.6 of this specification document). Note: temperatures below the minimum requirement may not fully activate the yeast, and temperatures above the maximum requirement will kill the yeast and thus preventing it from activating. | ||||
| 3.3 | Activator – any form of sweetener that would aid the leavening agent to activate and grow. Quantity shall yield 1 tablespoon of sugar or equivalent. Approved forms of sweeteners utilized may be sugar, honey, agave nectar, or that little ole lady from Pasadena… | ||||
| 3.4 | Bread flour – may substitute all-purpose flour when bread flour is not available. | ||||
| 3.5 | Flavor enhancer – salt. Just plain Kosher salt. | ||||
| 3.6 | Lubricant – any form of “cooking” oil (clarification was necessary as some have been known to use WD-40) or melted unsalted butter. The preferred lubricant shall be olive oil or equivalent. | ||||
| PART 4 - Scope of Work | |||||
| 4.1 | The baker shall turn the oven on and set the temperature to 135°F (57.22°C) in preparation of the proofing process. | ||||
| 4.2 | Mixing process – shall include two sub stages which are described as yeast activation and kneading process. | ||||
| A. | Yeast activation: | ||||
| 1 | The baker shall add the leavening agent (yeast) and the activator (sugar) to the water (refer to section Part 3-3.2 for temperature requirements) using an approved liquid measuring cup. The purpose of the activator is to assist the leavening agent in the activation process. | ||||
| 2 | The baker shall incorporate the materials (ingredients) by stirring the contents of the liquid measuring cup with an approved wooden spoon. | ||||
| 3 | The baker shall set this mixture aside for approximately 5 minutes to let the activation process take into effect. Refer to image 1 for clarification of visuals after the 5 minute rest period has elapsed. | ||||
| B. | Kneading process: | ||||
| 1 | Concurrently, the baker shall mix together 3 cups of flour and 2 teaspoons of the flavor enhancer (Kosher salt) into an approved mixing bowl (refer to image 2). | ||||
| 2 | Once the leavening agent has activated, the baker shall incorporate this mixture into the dry ingredients (flour and salt) (refer to image 3). | ||||
| 3 | Additionally, the baker shall incorporate ¼ cup of the lubricant (olive oil) into the mixing bowl (refer to image 4 for reference of quantity). | ||||
| 4 | Once all of the liquid and dry ingredients have been added into the mixing bowl, the baker shall proceed to incorporate these ingredients together by mixing with the use of a wooden spoon (refer to image 5). | ||||
| 5 | The baker shall continue with the mixing process until all ingredients have been fully incorporated (refer to image 6 for visuals of consistency). | ||||
| 6 | The baker shall add an additional 3 cups of flour to the wet mixture and with an approved dough scraper, scrape as much of the mixture from the wooden spoon (refer to image 7). | ||||
| 7 | The baker shall incorporate as much of the flour into the wet mixture with the dough scraper by scooping the flour underneath the mixture (refer to image 8). Continue this mixing process until the dough is covered with flour so that it could easily slide out of the bowl onto a kneading surface (refer to image 9). | ||||
| 8 | The baker shall continue to incorporate the flour to the wet dough using the dough scraper until the dough can be handled without being too sticky to the touch (refer to images 10 and 11). | ||||
| 9 | The baker shall then proceed with the kneading process. Images not shown as it is outside of this scope of work: | ||||
| a. | The baker shall gather dough into a pile and begin pressing it together. | ||||
| b. | The baker shall press the heels of his/her hands firmly into the dough, pushing forward slightly. | ||||
| c. | The baker shall fold the far edge of the dough upwards and back onto itself, and press it to the middle of the ball. The dough shall be rotated at a 90° turn. This press-fold-turn process for the duration of the kneading process until proper consistency is achieved. | ||||
| d. | The baker shall continue flouring the kneading surface as needed to prevent the dough from sticking. Care shall be taken into account with this process so as not to add too much flour to the dough that will render it too firm thus terminating into an inedible finished product. | ||||
| 10 | Testing the consistency of the dough: | ||||
| a. | Window method | ||||
| 01. | The baker shall remove a small portion of the dough and stretch it against a light. The dough shall have enough elasticity to be able to stretch and provide a translucent window pane effect without tearing (refer to image 12 for visual verification). | ||||
| b. | Dimple method | ||||
| 01. | The baker shall press on the dough with one finger to create a dimple. The dough shall have enough elasticity to spring back to shape (refer to image 13 for visuals). | ||||
| c. | Ear lobe method | ||||
| 01. | The baker shall pinch his/her ear lobe, wash their hands, and then pinch a small portion of the dough. The texture and elasticity feel shall be the same. | ||||
| 4.3 | Proofing process | ||||
| A. | First proof: | ||||
| 1 | The baker shall prepare an approved proofing bowl by thinly lubricating it with olive oil and wiping it down with a fresh clean paper towel. | ||||
| 2 | The baker shall transfer the completely kneaded dough onto the proofing bowl and lubricate the dough on all sides (refer to image 14). | ||||
| 3 | The baker shall loosely cover the proofing bowl with plastic wrap and place in an oven that has been heated to 135°F (57.22°C) to let rise. This rising process shall vary between 1 hour to 1 ½ hours depending on environmental climate conditions. | ||||
| B. | Second proof | ||||
| 1 | The dough shall double in size. This is an indication that the dough has risen properly. The baker shall then remove the proofing bowl out of the oven carefully and punch down the dough (refer to image 15.) This task deflates the dough, letting the air out so that it can be kneaded and formed into loaves. | ||||
| 2 | The baker shall divide the dough into two equal parts (refer to image 16) and continue to work the dough one part at a time. | ||||
| 3 | The baker shall roll out one half of the dough into a thin sheet using an approved rolling pin (refer to image 17). | ||||
| 4 | The dough half shall be rolled out to a rectangle ith a dimension measuring 15 inches by 12 inches. The baker shall fold the dough into thirds along the long side (refer to image 18). | ||||
| 5 | The dough shall be rolled into a cylinder (refer to image 19) with the flaps pinched to close the cylinder (refer to image 20), and the ends pressed and tucked underneath (refer to image 21) to prevent them from opening during the baking process. | ||||
| 6 | The dough shall be transferred onto a lightly lubricated bread pan (refer to image 22) and covered loosely with plastic wrap. | ||||
| 7 | The baker shall repeat steps 3 to 6 for the other half of the dough. | ||||
| 8 | The baker shall place both bread pans back in the oven set at the proofing temperature and let rise for a second time. The dough shall double in size. This rising process shall vary between 1 hour to 1 ½ hours depending on environmental climate conditions. | ||||
| 4.4 | Baking process | ||||
| A. | The baker shall remove the bread pans with the properly proofed dough from the oven and adjust the temperature setting of the oven to 350°F (176.67°C). | ||||
| B. | The baker shall cut a slit through the middle of the top surface of the dough (refer to image 23) and pour melted unsalted butter between the cut (refer to image 24) for additional flavor immediately after the oven comes to proper baking temperature. | ||||
| C. | The baker shall place the bread pans with the fully prepared dough back into the oven for the final steps of the baking process. The dough shall continue to bake until the proper baking period has been achieved (refer to image 25). The tests for determining proper baking period shall be accomplished using one or several of the following methods: | ||||
| 1 | Temperature reading method – (recommended) the temperature of the finished bread shall be taken with an approved instant read thermometer and shall measure 190°F (87.77°C). | ||||
| 2 | Color consistency method – the color of the finished bread shall be golden to medium brown. | ||||
| 3 | Sound method – the finished bread shall have a hollow sound when thumped with a finger at the top surface of the bread. | ||||
| D. | The properly baked bread shall produce a soft crusty exterior with a fluffy interior that displays the gluten strands and air pockets as crevices when sliced (refer to image 26). | ||||
End of section | |||||
Approved Images:
 Image 1 Image 1 |  Image 2 Image 2 |  Image 3 |  Image 4 Image 4 |
 Image 5 Image 5 |  Image 6 Image 6 |  Image 7 Image 7 |  Image 8 Image 8 |
 |  |  |  |
 |  |  |  |
 |  |  |  |
 |  |  |  |
 |  |
Poor man's gourmet beef broccoli
- 1-1/2 to 2 pounds of round steak (depending on how hungry you are)
- 3/4 cup of soy sauce
- 1 tablespoon of plum sauce (this ingredient should be available at your major grocery store with Asian ingredients, or from your nearest Chinatown. If you're already in China, hey you're in luck - just reach out of your window and borrow some from your neighbor...) It's a viscous jelly type of sauce with a sweet and sour flavor made with plums or other stone fruits mixed with sugar, vinegar, ginger, and chiles. Basically it's a Chinese version of Indian Chutney.
- Zest of one lemon
- 1 1/3 tablespoon of lemon juice (that's equal to 4 teaspoons or approximately half the lemon)
- 1 julienned carrot (not to be confused with the aspiring new fashion designer duo Julie and Karet)
- 1/2 bunch of American Broccoli. For those of you trying to make logic of what half a bunch is by thinking "well, a bunch is a lot; ergo half a bunch is not that much...", and still have no clue; a bunch equals 1-1/2 to 2 pounds which yeilds about six to eight servings.
- 1 medium onion thinly sliced - figure a large onion is the size as a softball and a small onion is the size of a baseball, so somewhere in between. NOTE: do not slice the softball or baseball!
- 2 cloves of garlic
- 1 tablespoon of olive oil
- 1 tablespoon of cornstarch
- cooked long grain white Japanese rice or basmati rice
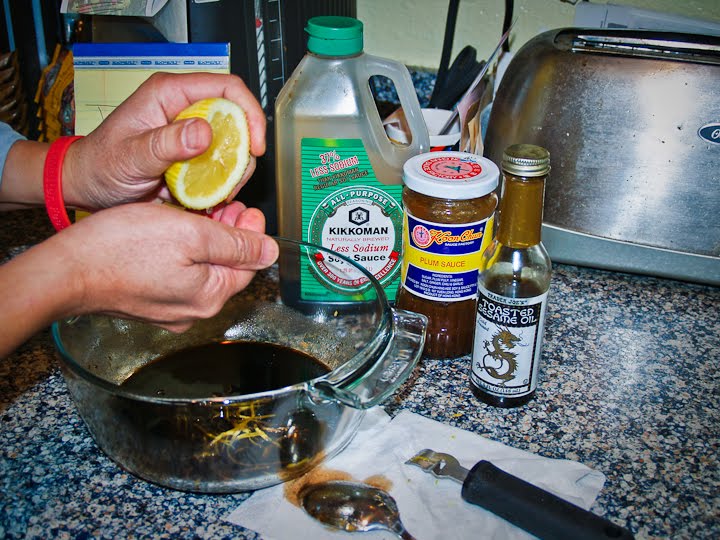
- Mix the marinade in a bowl that is big enough to hold the liquids and sliced meat. Need to look for a bowl? Go ahead - I'll wait... (one mississippi, two mississippi, three mississippi, zzzz, zzzz, zzzzzzzzzzz; huh, oh hey, you're back!). Mix all the liquid ingredients of soy sauce and plum sauce. The sesame oil in the photo is a guest appearance although it's not used in this recipe. It's there for visual effects because as we are all aware - sesame seed oil conjures up ideas of Chinese authenticity. In reality our dish is a simple variation of the Chinese American version similar to what you would get at any "Golden" or "Royal" whatever restaurant.
- Next zest a lemon into the bowl as shown on this picutre; as I've mentioned several times before in past blogs (and where ever I give cooking lessons; wink, wink, nudge, nudge - you know what I'm sayin'? Eh?!), the taste of any citrus fruit is in the zest - don't pay any attention to those little notes and reminders that my wife leaves for me.
- Now squeeze the lemon half while cupping your other hand underneath to catch the seeds while letting the juice flow through between your fingers into the bowl. Savor this experience for a minute as it whisks you away to visions of lemon trees soaking in the rain and the citrusy aroma wafts through the air giving it that fresh clean scent of lemon scented Pledge... That my friends is called "aroma therapy..."
- Add a pinch of ground black pepper (a pinch is any small amount that you can hold between your fore finger and thumb; for those who have small fingers or don't have any thumb - it approximately 1/16 teaspoon)
- Slice up the meat into 1/4 inch slices on the diagonal against the grain as shown here. Slicing the meat this way ensures that you are cutting against the grain which means more tender slices (which means easier to chew; which means easier to digest; which means easier to... well, you get the picture). I can't believe he just said that...
- Place the meat in the marinade and let it soak in all that flavor while you prepare the vegetables. If you wish, you can add a shot of dry sherry (the wine not the stripper) into the bowl so the meat can "party all the time, party all the time, party all the time!"
- For the vegetables, start by peeling the carrots and cut it into small straws the size of toothpicks. Keep in mind that the thinner your carrots are, the faster they cook. Next cut up the broccoli so that you end up with small bite-sized florets. You can also cut the stem into small bite-sized pieces or about 1 inch cubes. If you have large stems, you might want to peel the skin off a little because they tend to get chewy rather than crunchy during the cooking process.
Slice up the onion in thin slices and finally finely mince the garlic. - The cooking process for this dish requires one cooking vessel and a technique most common to Chinese cuisine called Stir-fry. The cooking vessel that we are using here is The Wok (yes, the wok!) aptly named because the cooking vessel does all the wok! (you see what I did there?! now that's funny!) If you don't have a wok, you can use a large saute or fry pan. The key is to make sure that the cooking vessel is heated prior to adding the oil and any other ingredient. The object of the technique is to immediately sear in the flavors within the food by cooking the exterior of the meat immediately and have the heat radiate towards the middle to finish the cooking process. Since all of the ingredients, with the exception of the broccoli, are cut very thin, cooking them takes approximately less than 1 minute.

Start by adding the oil immediately followed by the meat into the wok (save the marinade). You should hear lots of sizzle which indicates that your cooking vessel was properly heated. If your wok or pan is not hot enough, you will boil the meat instead of stir-frying (you will go to jail, you'll not pass go, and will not collect $200 - on top of this, you will loose a turn...). Alternatively, you will most likely get a more chewy texture when you bite into the meat.
Remember to keep turning the meat so that both sides are cooked and to prevent burning the food (as in stir the pot, Marge! That's why they call it stir-frying). - Push the meat along the side of the wok to reduce the cooking temperature. The idea of the shape of the wok is temperature control. The ingredients cooking towards the center of the wok are cooking at high heat; the ingredients around the middle perimeter of the wok gets cooked at medium heat; and low heat for ingredients positioned near the top of the wok. Start Adding your vegetables starting with the onions, followed by the broccoli, and then the carrots.
- Cook the vegetables for about a minute. If the sizzle subsides, add a little bit more oil and crank up the heat a little. Continue to stir the ingredients.
- Now whisk in a tablespoon of corn starch to the marinade and make sure that it is fully incorporated. If you want to end up with lots of sauce at the bottom of the dish, you can add a cup of cold water and whisk another tablespoon of corn starch to this mixture. You will need to readjust your seasoning with Kosher salt and ground black pepper right before the end of the cooking process.
- Combine the meat and the vegetables by stirring them together and add the minced garlic. Stir, then add the marinade. Let the marinade come to a boil to thicken. Stir, stir, stir... mix, mix, mix - then adjust your seasoning prior to turning off the heat.
- Now here's where the gourmet part comes in... Grab one of those (clean) small plastic containers that they give you at fancy restaurants to take your leftovers in and serve up some rice filling half of the container. Then scoop up some of that deliciuos beef broccoli stir-fry that you just made onto the other half of the container. Sprinkle the beef broccoli with a pinch of white sesame seeds (and if you happen to have some black sesame seeds, you can sprinkle a pinch of that on top of the rice). Take step back and look at your creation and marvel at how fancy and gourmeyish it looks... If anybody asks where you got that delicious looking dish, you can tell them that you've just opened a fancy Chinese restaurant called "The Golden _______ (fill in your favorite word here)" and that this is one of the dishes in the menu. Yes, you will be perpetuating a conspiracy that you are now somehow an owner of a fancy restaurant; but it's okay. Your secret is safe with me...



 |
 |
 |


Return to Gourmet Conspiracy Website
About Me
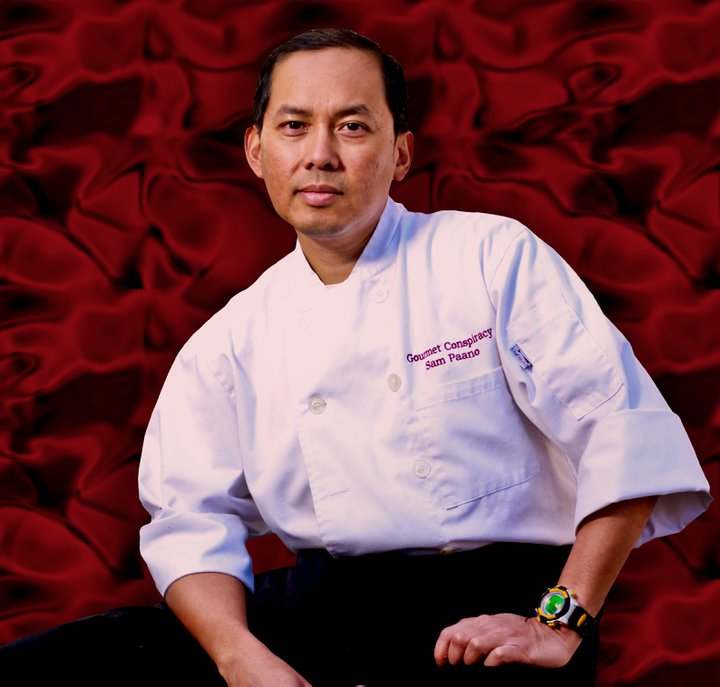
- Chef Sam Paano
- I am the co-owner and founder of Gourmet Conspiracy, a personal chef and catering service based in Lakewood, California. My objective here is to provide open communication about various types of food and their benefits towards our health. As far as my training, I graduated from Kitchen Academy in July 2007 with high honors. I have a great deal of passion about learning the cooking styles and techniques from various cultures and incorporating them in fusion dishes.
